In the complex world of data storage and redundancy, RAID 1 is a valiant defender against the imminent threat of data loss. However, even the most robust systems can face challenges, and one such formidable adversary is the prospect of drive failure within a RAID 1 array. This guide delves into the intricacies of RAID 1 drive failure – from understanding the potential causes to recognizing warning signs and, crucially, the meticulous steps involved in rebuilding RAID 1 after a drive failure.
As we diligently navigate the intricacy of this recovery process, we are here to shed light on PITS Global Data Recovery Services. With a proven track record, we proudly stand as a trusted ally in the realm of RAID failures. Our team of experts possesses specialised expertise and innovative solutions, ensuring the successful salvage of valuable data that teeters on the brink of loss. Rest assured, with our unwavering commitment, we strive to provide unparalleled service and peace of mind to our clients.
RAID 1 Drive Failure
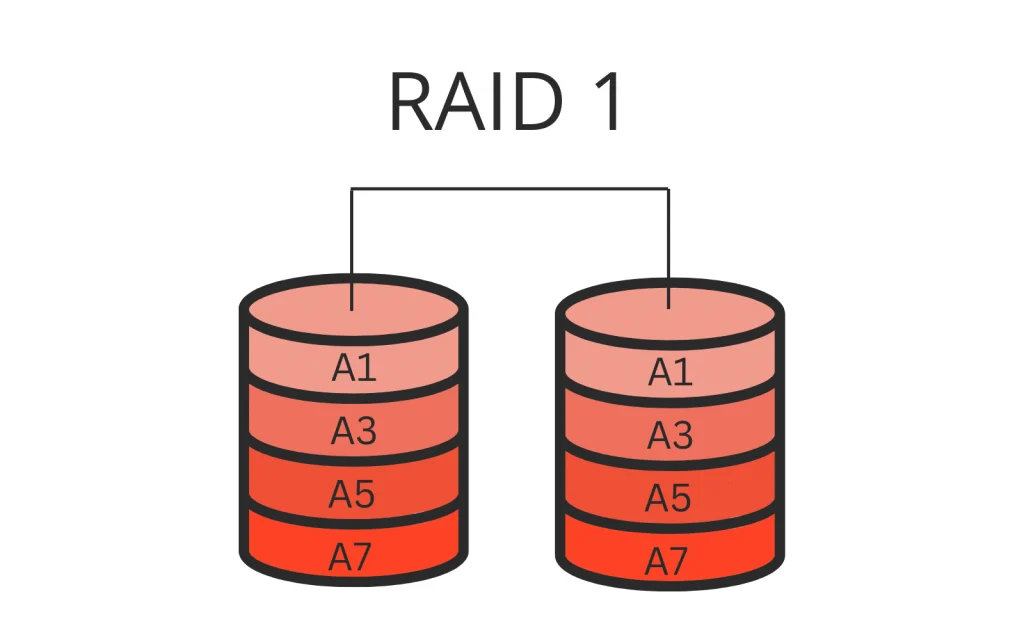
RAID 1, or mirroring, is a data storage configuration that duplicates information across two or more hard drives, creating an identical copy, or mirror, of the data. This mirroring concept ensures that if one drive fails, the system can seamlessly switch to the mirrored drive, preventing data loss and minimising downtime. The beauty of RAID 1 lies in its ability to provide redundancy, offering a safety net against the unpredictable nature of hardware failures.
Causes of Hard Drive Failure in RAID 1:
Despite RAID 1’s resilient design, hard drive failures can still happen. Understanding the potential causes is vital for taking preventive measures.
Common factors contributing to RAID 1 drive failure include mechanical problems like disk platter damage, electronic failures, overheating, and human error during maintenance or upgrades.
By recognising these factors, administrators can proactively take steps to mitigate risks and ensure the ongoing reliability of their RAID 1 array.
Recognizing Signs of RAID 1 Hard Drive Failure
Recognising the initial indications of a deteriorating drive in your RAID 1 array is crucial to avoid data loss. Watch for subtle hints such as decreased performance, unexpected crashes, or unusual sounds from the hardware. These warning signs may suggest an underlying problem that, if dealt with promptly, can prevent a complete drive failure.
Importance of Proactive Monitoring and Regular Checks
Maintaining a healthy RAID 1 system requires carefulness as the primary factor. By consistently monitoring performance metrics and conducting regular checks on the status of each drive, potential issues can be identified before they become major problems. Taking proactive measures like these not only improves the overall reliability of the RAID 1 array but also allows administrators to address any issues promptly.
Steps to Recover from RAID 1 Drive Failure
Dealing with a RAID 1 drive failure can feel overwhelming, but following a systematic recovery approach can help retrieve important data. Before proceeding with the steps, it’s crucial to calmly assess the situation. The first critical step is identifying the failed drive, which sets the foundation for subsequent actions.
Once the problematic drive is identified, the next step involves isolating it from the RAID array to prevent further complications. With these initial measures in place, the focus then shifts to implementing practical data recovery methods tailored to the specific circumstances of the RAID 1 drive failure.
1
Initial Assessment and Identification of the Failed Drive
Start the recovery process by comprehensively assessing the RAID 1 array. Identify the specific drive that has experienced a failure. This initial step sets the groundwork for focused actions in the subsequent recovery stages.
2
Isolating the Failed Drive from the RAID Array
After identifying the problematic drive, remove it from the RAID array. This can be done by physically or logically disconnecting the failed drive to avoid any potential data corruption or interference with the recovery process.
3
Data Recovery Methods for RAID 1 Drive Failure
It is essential to implement efficient techniques for data recovery. The methods employed will vary depending on the type of failure, such as reconstructing the RAID array with a new drive, retrieving data from backups, or seeking professional data recovery services. Adapting the approach to the specific situation will increase the likelihood of a successful recovery.

Rebuilding RAID 1 After Drive Failure
Restoring data integrity and redundancy after a RAID 1 drive failure requires a careful procedure. Follow these simple steps to rebuild your RAID 1 array:
Following these detailed guidelines, you can successfully reconstruct your RAID 1 array following a drive failure. This process will reinstate the redundancy and data safeguarding that RAID 1 is specifically engineered to deliver
Why Choose PITS Global for RAID 1 Recovery
PITS Global distinguishes itself with its advanced technology, industry expertise, and commitment to client satisfaction. The company utilises state-of-the-art tools and customised methods for RAID 1 recovery, ensuring a prompt and secure retrieval of your valuable data. Focusing on transparency and personalised attention, PITS Global has become the preferred choice for those needing a dependable solution for RAID 1 drive failures.
Client Success Stories and Testimonials:
The true measure of a data recovery service lies in its clients’ success stories and testimonials. PITS Global takes pride in a portfolio of satisfied customers who have experienced seamless recoveries, even in complex RAID failure scenarios. Real-world examples and client testimonials prove PITS Global’s expertise in overcoming the challenges of RAID 1 data recovery, instilling confidence in those considering their services.
Frequently Asked Questions
What steps should be taken to recover from RAID 1 drive failure?
The recovery procedure includes an initial assessment to identify the failed drive, isolating it from the RAID array to avoid further issues, and then utilising data recovery techniques such as specialised software tools and professional services.
What are common indicators of a failing drive in RAID 1?
Indicators of a deteriorating drive in RAID 1 include reduced performance, unexpected system failures, or unusual sounds emanating from the device. It is crucial to identify these early signs as a preventive measure against data loss.
Why choose PITS Global for RAID 1 recovery?
PITS GLOBAL Data Recovery Services is a specialist in dealing with RAID failures, offering cutting-edge technology, industry expertise, and a commitment to meeting client requirements. With their expertise in RAID 1 recovery and a dedication to transparent and personalised service, they are a dependable option for all data recovery needs.
What is RAID 1?
RAID 1, or mirroring, is a data storage setup that duplicates data across multiple hard drives. By replicating information, RAID 1 ensures that if one drive fails, the system can seamlessly switch to the mirrored drive. This guarantees data integrity, prevents data loss, and minimises downtime.
Can RAID 1 cause hard drive failure?
No, hard disk failure isn’t caused by RAID 1 itself. RAID 1 is specifically designed to protect against data loss by duplicating information across multiple disks. However, it’s possible for individual disks in the RAID array to experience failures due to factors like mechanical issues, electronic malfunctions, overheating, or human errors during maintenance or upgrades.